You’ll love this Pottery Barn dresser lookalike! See where it started and how far it’s come.
Free dresser and nightstand
I answered an ad on my local Freecycle website and agreed to pick up a dresser and nightstand “sight unseen”. Imagine how thrilled MyLove was when I begged and pleaded persuaded him to drive 20 miles across town to meet with a stranger to pick it up. #notthrilledatall.
Luckily, he is used to me and my furniture requests so he went along with it…until we drove up and saw this dreadful sight.
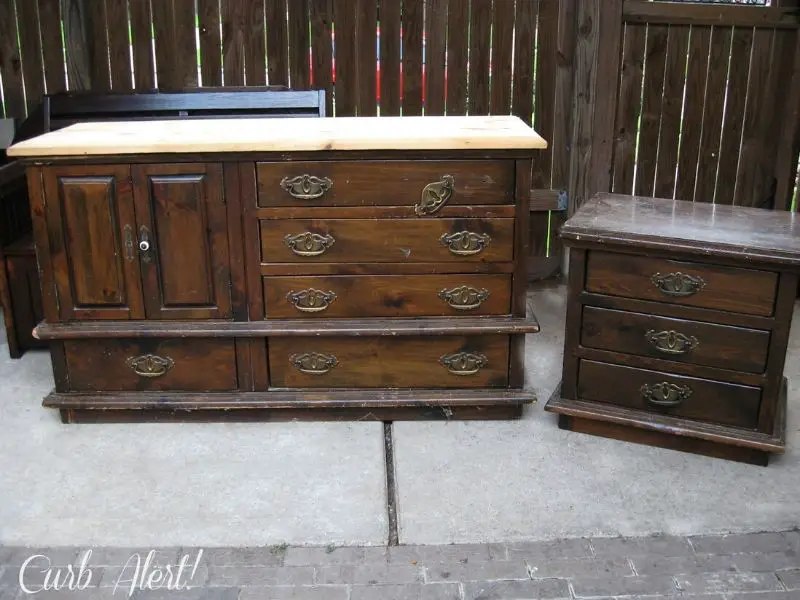
The lady raved about what an heirloom it was to her and thanked us for coming to pick them up so quickly as she snuck over to take a $100 For Sale sign off of them so we would not see them. She mentioned that they were passed down through her family and her husband started sanding on the dresser top then suddenly passed away.
As I mentioned, I got them off of Freecycle so they were “Free-Ninety-Nine” as my friend would say. Thank goodness, because they were looking pretty old and shabby, and not in the “shabby chic” kind of way.
I looked over at MyLove rolling his eyes and could feel his blood boiling, secretly cursing me all the way to the truck. Because these suckers were HEAVY, solid wood SUPER HEAVY!
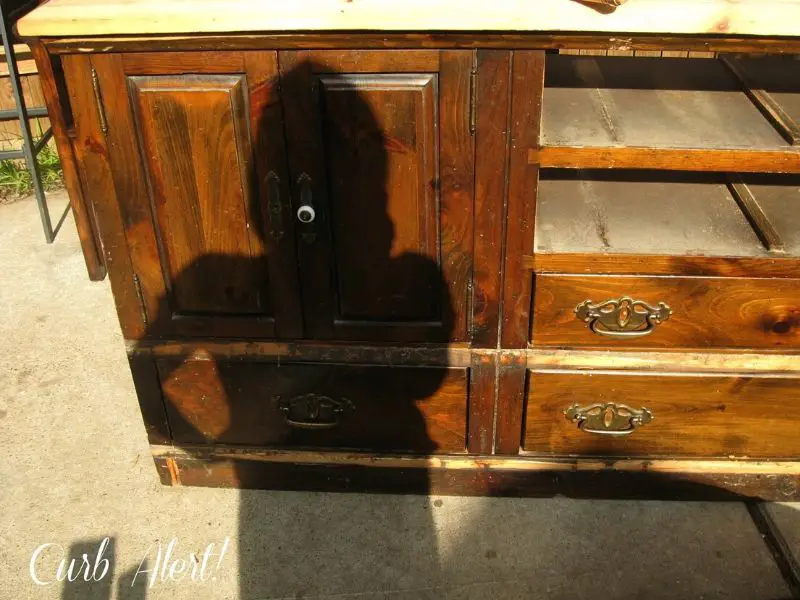
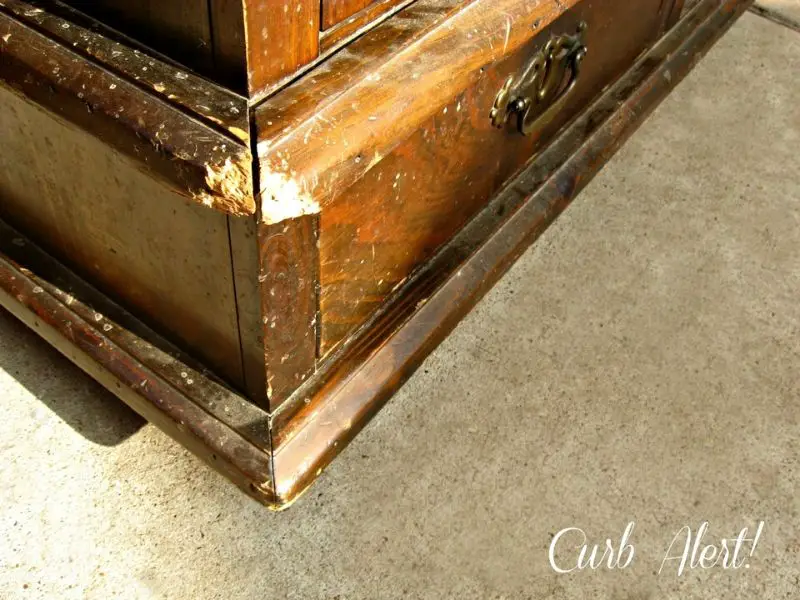
And did I mention they were UGLY! Excuse the shadow 😛
We passed two Goodwill stores on the way home and MyLove begged me to drop them off and donate them right away.
but I talked him into letting me keep them because I somehow could already see their POTENTIAL. He agreed to let me try.
Ewwww!!!
He saw YUCK, (or may I say in his words), CR@P!
I saw Pottery Barn.
I don’t know why, but I have been eyeballing a black Pottery Barn dresser and wanted to try to replicate it. Seriously, why not? Couldn’t hurt.
Learning how to achieve the Pottery Barn look
I found a great tutorial explaining how to achieve the Pottery Barn Finish from The Yellow Cape Cod and followed it step by step to a “T”!
She has done such a fabulous job of explaining how to, that I am just going to show you the progress through my pictures.
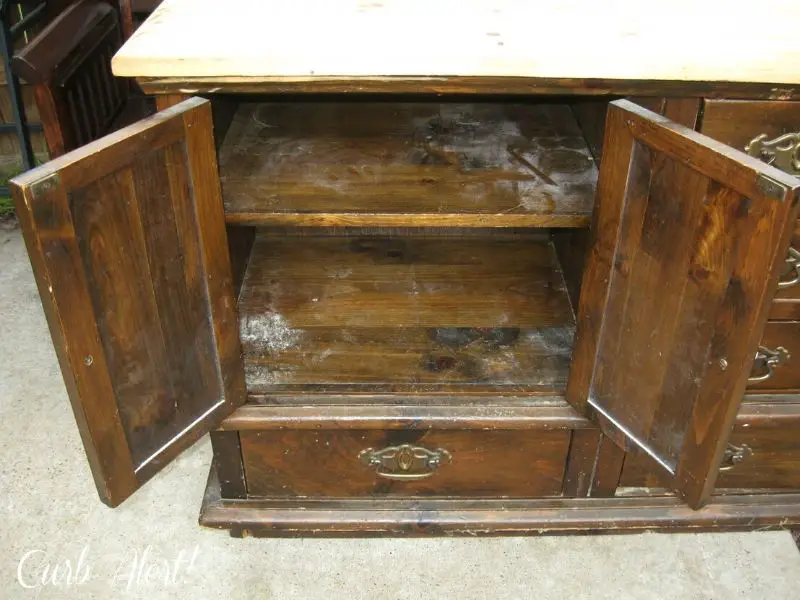
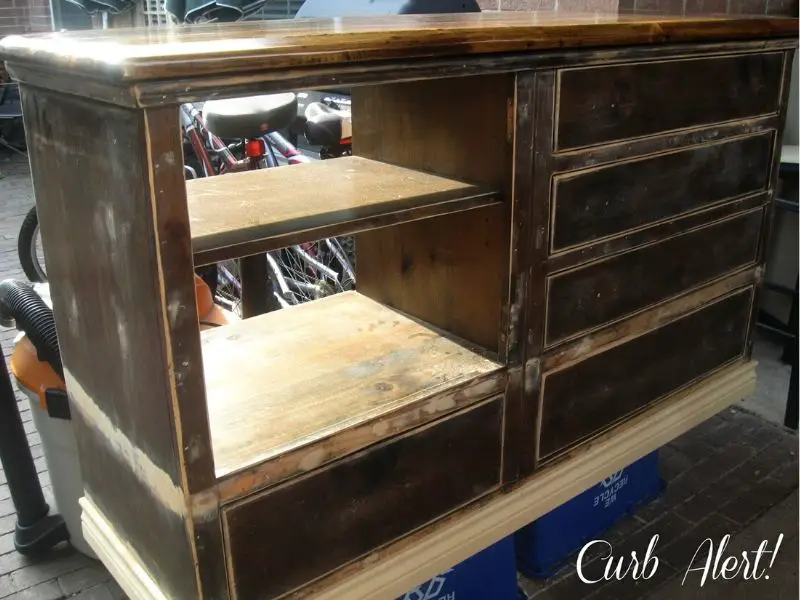
I FIRST took the backside off and laid the dresser and drawers out in the sun for a week. I also cleaned every nook and cranny with a vacuum and wiped it all down with paint thinner.
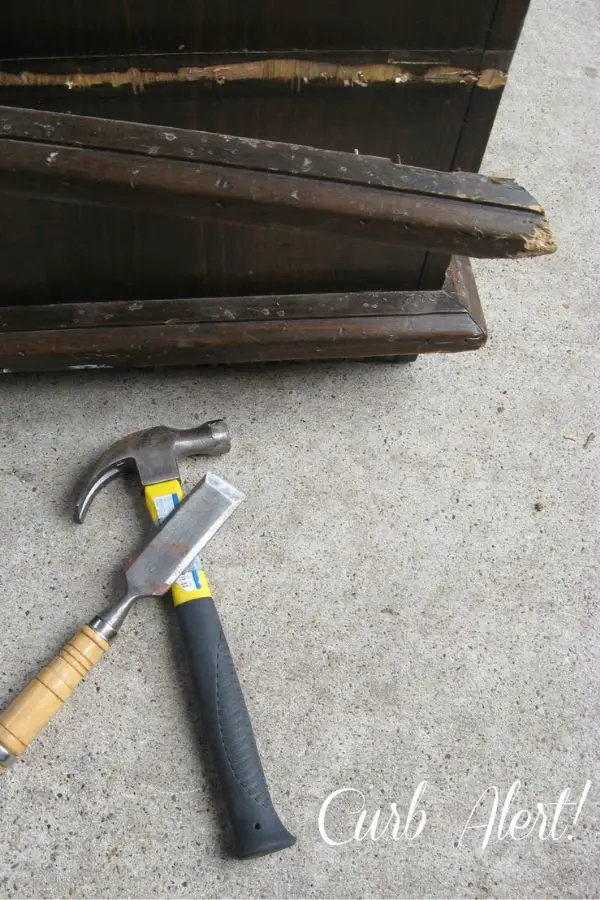
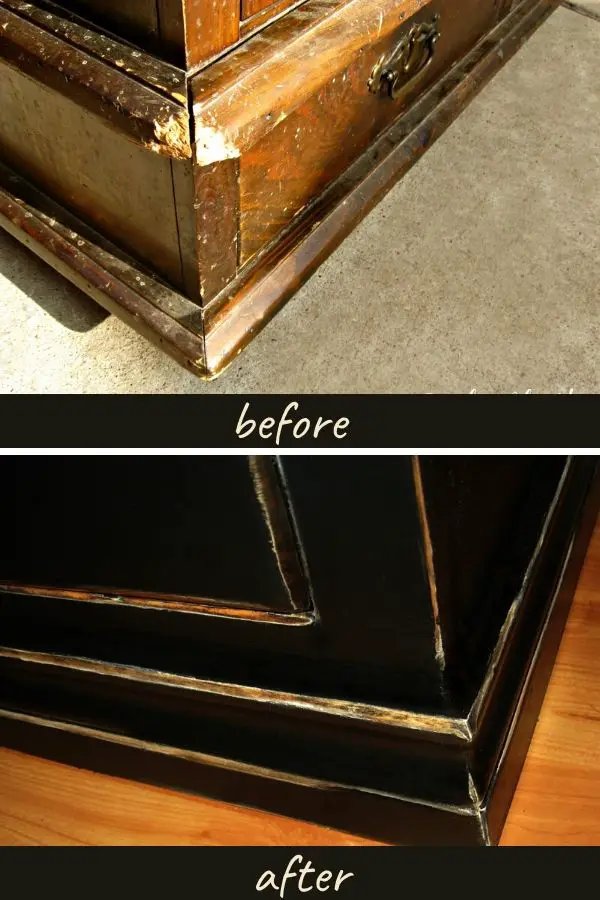
It definitely needed some cosmetic work, so I stripped off all of the odd moldings and replaced them with new moldings.
Look at those perfect corners!
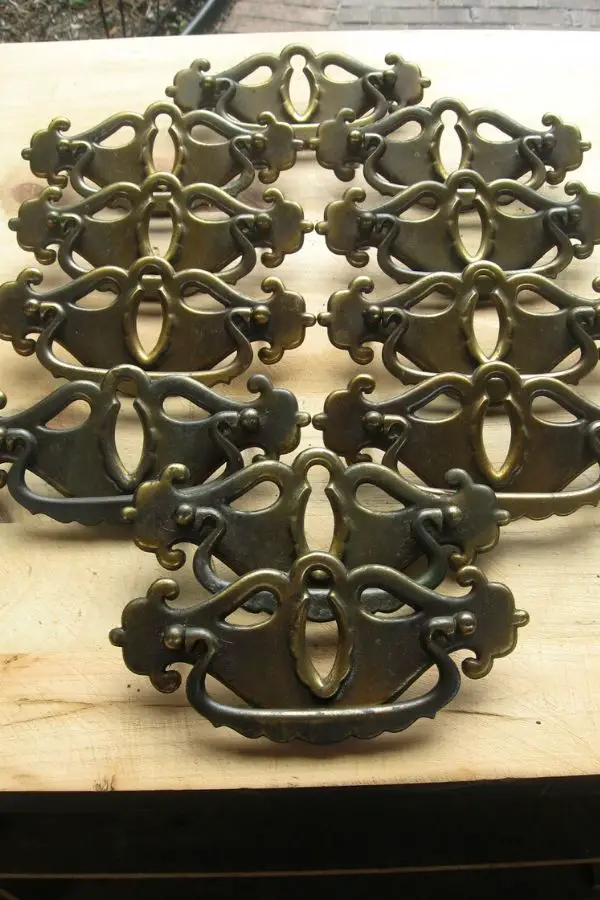
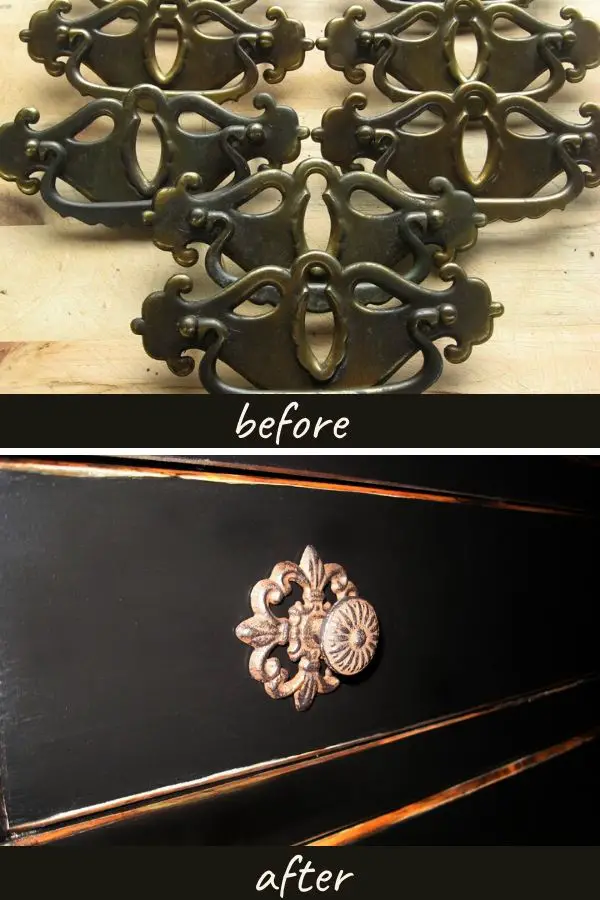
I took off the cabinet doors and stripped off the old ugly hardware too.
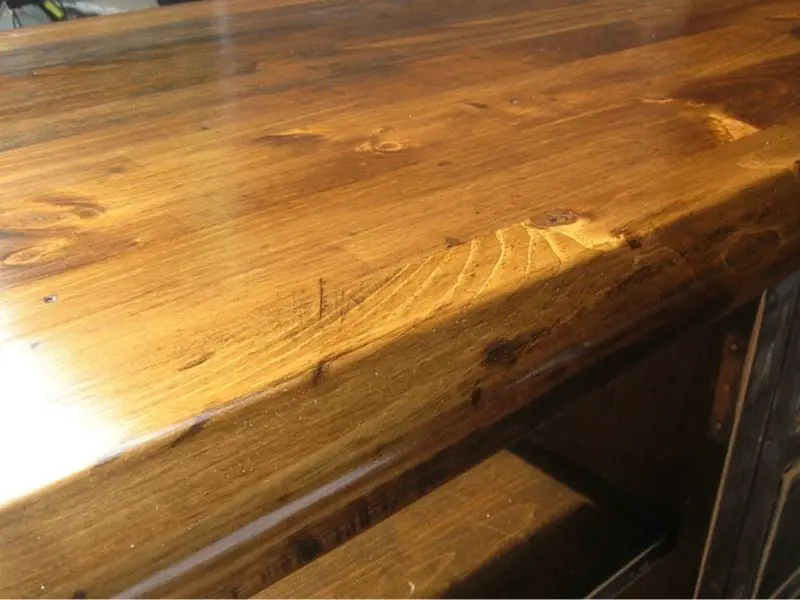
I sanded and sanded the top some more for what seemed like forever. The husband must have used a belt-sander and sanded sideways because I never got all of the deep gouges and grooves out. I did the best I could and got a little sidetracked from my painting tutorial and stained the top Minwax Dark Walnut stain.
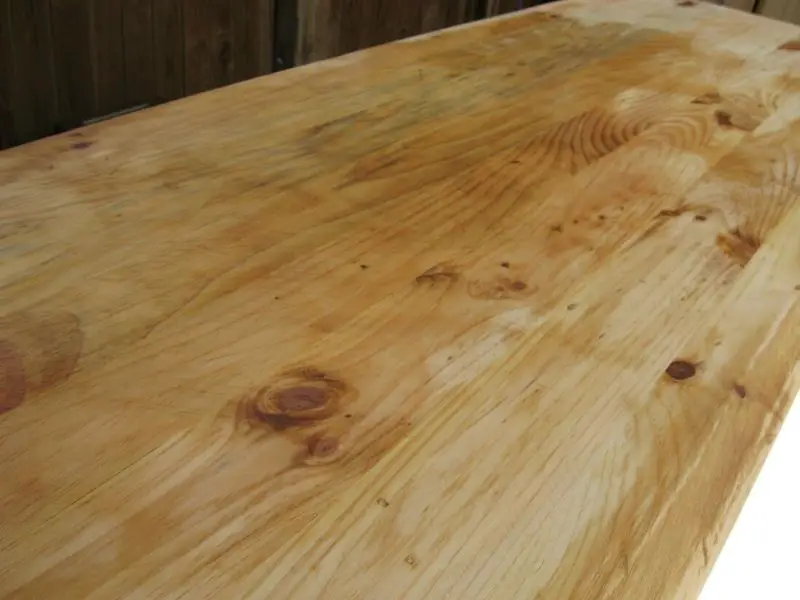
It turned out pretty nice, considering what I had to work with.
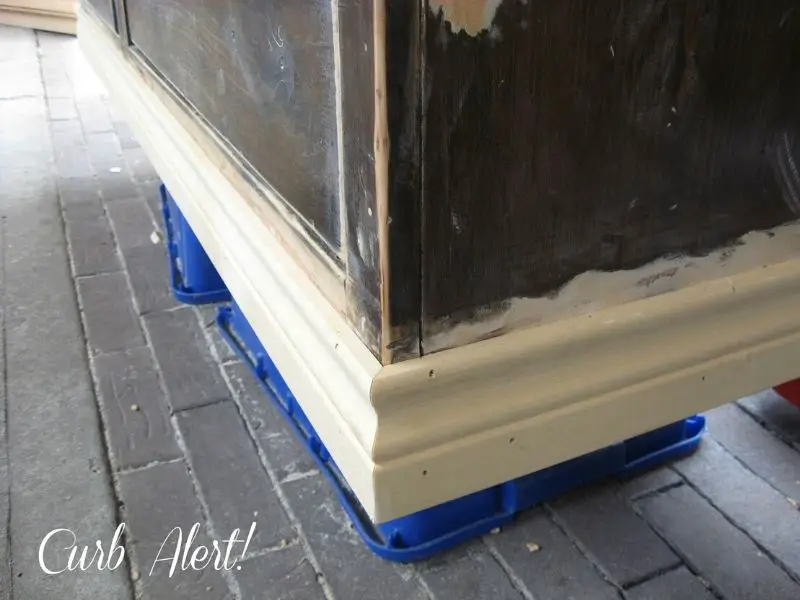
Back to the painting tutorial: I sanded, primed, painted, sanded more, painted more, sanded more between coats, distressed the edges, step by step!
Whew!!!
But it was SO worth it!
Related: Metallic Silver Bombay Dresser Makeover
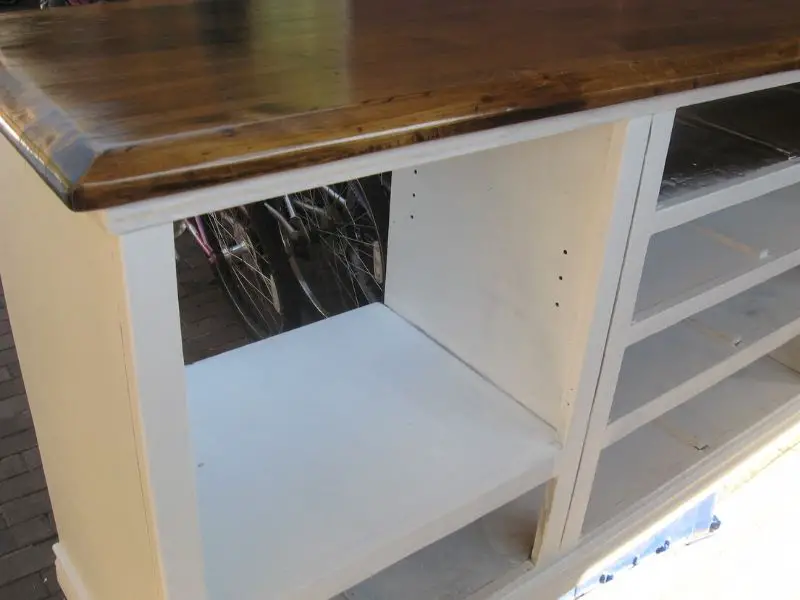
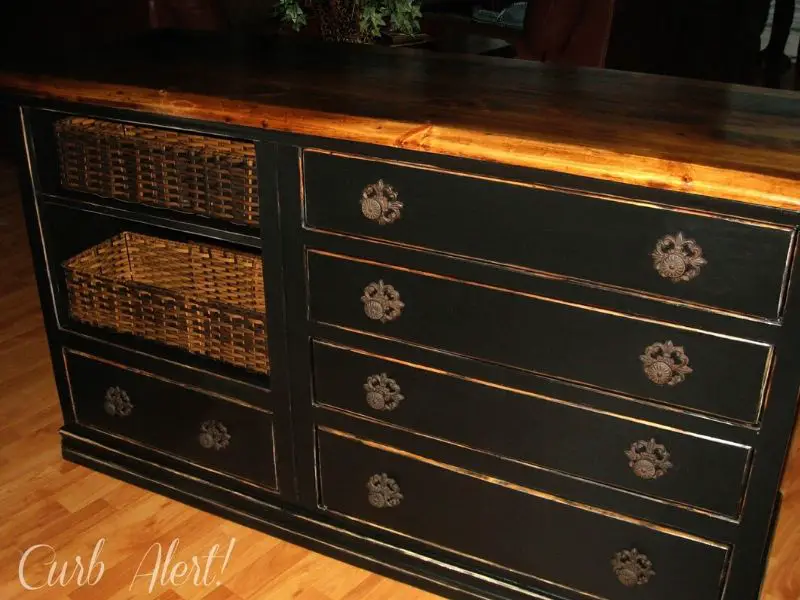
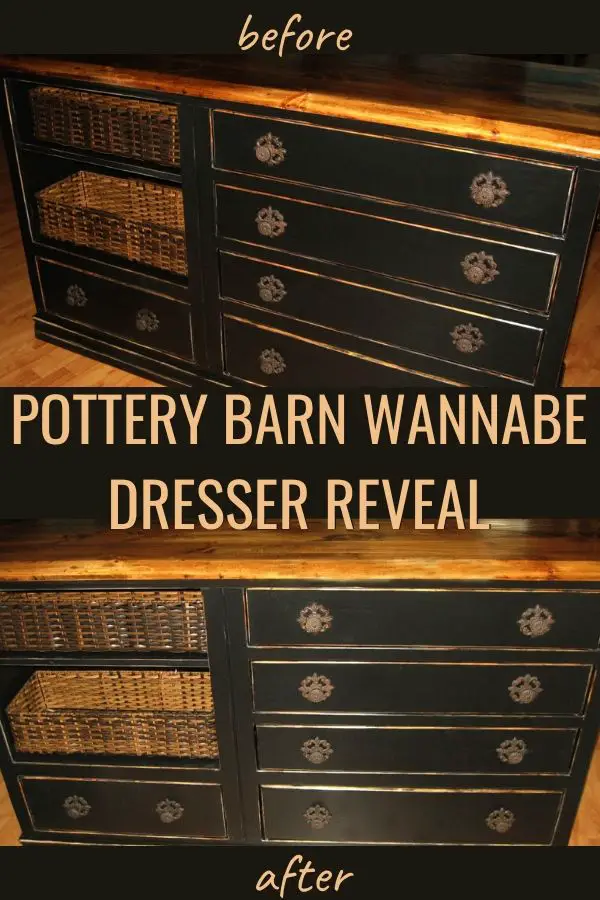
Pottery Barn Dresser Reveal
Check out the before and after! WOW!
LOVING IT!
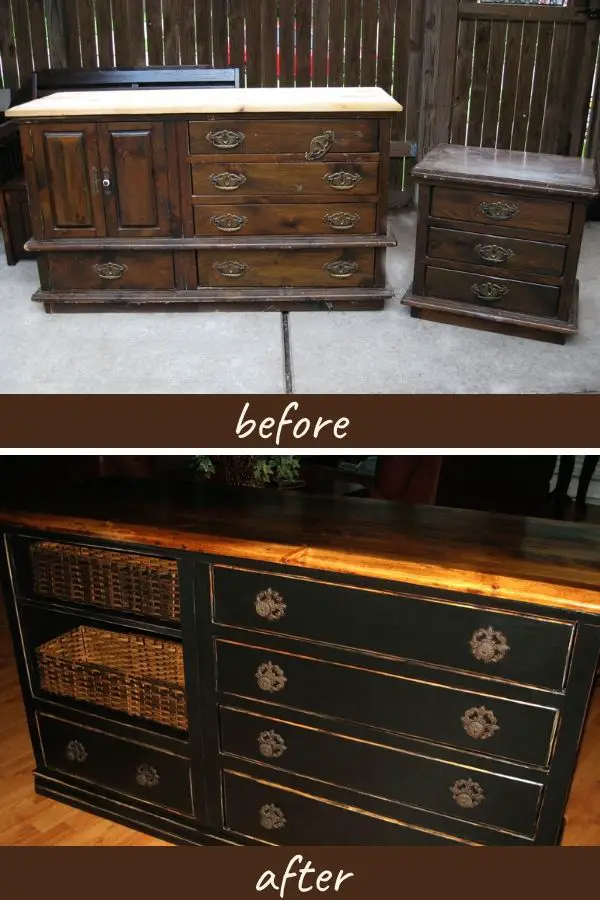
It looks so different with new baskets and Hardware (both purchased 50% off at Hobby Lobby). I envision its new life as a brand “new to me” Media Cabinet.

The piece looks way more updated, don’t you think?
Check out the hardware before and after: looks a little like Fleur de Lis (LOVE)
And check out my handiwork with a little help from MyLove: from ugly to updated corners: mow distressed and stylish!
I am impressed with the results and as it does appear a little different than my Pottery Barn Inspiration Piece I am ecstatic with the results!
I’ll leave you with a couple more beauty shots. Enjoy! Happy Treasure Hunting!

Fanfreakintastic!! Seriously. I always love your transformations.
Thanks for sharing.
I am in awe. I absolutely adore it when people use Pottery Barn as an inspiration and then put their own little tweak on it. YOU DID GREAT! I'm a little scared of doing a project like this… but perhaps if i could practice on something free I could summon up the courage! I better click to follow you in case you come up with any more tips I need! Honestly, great job, great blog… can't wait to see your past posts! xoxo jules
Another amazingly great rescue!
LOVE it! You amaze me!
Amazing … I know that kind of furniture is super heavy. Glad you recycled it.
Blessings,
Audrey Z. http://thespacebetweenblog.net/
Timeless Treasures
awesome awesome job it looks way better than pb hee hee
Very impressive. Looks wonderful…I think part of me thought your husband was right, ditch em, and ditch em quick…You did an outstanding job. Thumbs up!!! 🙂
Tami, you did an amazing job on this piece!!!! It is just gorgeous!!! Worth all the work!!!
Unbelievable!!! You did an awesome job transforming an ugly duckling into a graceful swan. After seeing that transformation I believe any piece of real wood furniture has potential. Bet your husband will not argue about picking up surprise pieces anymore.
Your dresser is gorgeous! I love the finish you used, the baskets and the contrast with staining the top. Great job! I'm visiting from Craft-O-Matic. Have a great week!
Deborah
Found you through You Are Talkin Too Much's Link party and I ventured over because I LOVE good before and after furniture story! This one is fantastic! Your hard work shows in the after and its hard to believe that it is the same piece. Congrats on a job very well done!
Oh I love a good Pottery Barn wannabe project! You did a great job!
You did such a good job!!
Wow! I love how you thought to take the moulding off. That would have made me pass this piece by straight away. Gorgeous transformation!
You are the bomb! I can't get over the transformation! Great work!!!
Wow that turned out spectacular! I wasn't seeing the potential you did…hubby may have won that one if it was me! I love the stained top contrasting the black…
W-O-W!!!! You've got a beauty there now. It's gorgeous :)))
Tami, you are truly incredible!!!!!!! So glad to have you back on the Korner. Your hubby sounds exactly like mine! But I think even I would have been tempted to drop it off at one of those Goodwills!!! thank GOODNESS you didn't!!!!!!!!!!!!!!!
GREAT job, taking that extra piece of trim off near the bottom helped so much. The finish and hardware are perfect! I was on the fence about whether to paint my entry piece white or black but I am leaning towards black like this.
That's a wonderful restyling and paint job on the piece! Hubby must have been mighty impressed. ~ Maureen
wow! you did a great job! nothing wrong with meeting strangers half away across town to get a dresser..when your husband's with you! haha
following your blog via the gfc blog hop. looking forward to future posts 🙂
morgan
Oh you are so my hero. I love this…
Aloha,
Following ya now and forever and ever from the GFC hop. We're riding the wave of life together at localsugarhawaii.com and I would so love to have ya with me on this great adventure. Come join us!
xoxo,
Nicole
localsugarhawaii.com
Newest follower here! I found you through the Tuesday blog hop! Cute blog, I can’t wait to read more!
-meandmr.com
omygoodness! This is the best transformation I have seen in a looong time! Maybe THE best! Love it, and am inspired.
OHHHHH wow, turned out gorgeous, you worked so hard on it, bet your glad its done !!!!
Paula
Terrific! Love your hardware.. so much so that I have the same ones in my laundry room.
new[est] follower from the blog hop! your blog is adorable! LOVE THIS POST! can't wait to keep following along!
stop by sometime!
kalobandelise.blogspot.com
Wow! You did a fantastic job, Tami! Love the color and it looks like a totally different {and better looking} dresser. How's the hubs like it now? : )
It is gorgeous! I can hardly believe it's the same dresser you started with! I just found your blog from 52 Mantels and I'm so glad! Going off to browse your other awesome stuff!
That is just amazing. I an majorly impressed with where you took that piece. Very nice job 🙂
Thanks for linking up!
Stacey of Embracing Change
Okay, this is stunning. It looks even better than the pottery barn one! I love it! Great job.
Kirsten@madeforaking
Wow mama!!! You are so so good at this! I would pay money for that!
Great job! And you saved how much $$$. Very inspirational and pin worthy!! This is going on my "I can do this" board.
This is unbelievably AWESOME! You did a fantastic job! I'm a new follower and am off to look around your great blog!
Beautiful! I love it. Checking out your blog from a link from one of the HomeTalk BlogTalk bloggers on Facebook. Nice to meet you (sorta'!). I love your blog. If you'd like, please check out my blog at http://www.dogsdonteatpizza.com. Thanks!
Breathtaking!!! Shocked my socks off…I was agreeing with your man that you should have dropped it at the Goodwill!! The reveal blew me away…Great JOB!!!
My sister and I host a joint party and we'd love for you to join us. Remember, when you link up at one site, it shows up on both my blog and my sister's blog too…double exposure!!
http://www.saving4six.com/2012/10/welcome-to-think-tank-thursday-2.html
What a transformation! I love it.
Oh my goodness!! no kidding with the potential baby! My husband would have done the same thing as yours 🙂 and has… often 🙂 They look amazing!
Fabulous job! And what an ambitious job. I've got two dresser to update myself but keep putting them off because it's so much work. You inspire me!
Gorgeous! You nailed it. I'm featuring your dresser in the Power of Paint Party Spotlight this weekend. Thanks for linking up…
I LOOOOOVVVVEEEEE this and love that you stuck to your guns in all the step by dreaded step!! Way to go!! It really shows on this piece!! Woo Hoo!!
Absolutely beautiful job! I love it when the men in our lives doubt our sanity and then have to admit we're pretty darn special!
Good Lord! That is absolutely amazing! You did a wonderful job transforming this. Thank you for sharing this at my Make it Pretty Monday party at The Dedicated House. Hope to see your prettiness again on Monday. Toodles, Kathryn @TheDedicatedHouse
Wow! Gorgeous stuff! I am your newest follower and was hoping that you would hop on over to my blog and return the favor!!
http://www.enjoyingtheepiphany.com
Thank you!
Sarah
Absolutely beautiful and I love the baskets!
Wow! That is an amazing transformation!! LOVE LOVE IT!
In all sincerity, I think it's prettier and more amazing than the Pottery Barn version. I love what you did with it! I love how the mouldings changed the look too.
Btw-visiting from Kammy's Korner. Just had to see the befores–it was well worth it!
FABULOUS!!! Just one question if you don't mind. Do you 'treat' your curbside finds to prevent bringing 'creapy crawlers' into your home? That has always been a fear of mine.
Hey Tami girl, this was the most viewed link last week which means congrats on the feature! 🙂
Beautiful! I love to see someone take something nobody else wanted and make it into something beautiful. You put in a lot of work and it shows. Wonderful job. I'm a new follower. Won't you come by and share with my readers at Totally Transformed Tuesday? They'll love it! Hope you have time to stop by. http://pjhdesignsoneofakind.blogspot.com Hugs, Peggy
I came across this from iHeartNaptime and it caught my eye because I have an entertainment center I am looking to redo and needed inspiration. THANK YOU! Seeing how absolutely hideous this was before and how beautiful it is now truly inspired me! If the sun comes out this weekend, that may be my weekend project! Thanks again! You did an awesome job and the result is just beautiful!
It's so gorgeous, I had to feature you! Thanks for linking up last week, we'd love to have you back!
http://www.joyfulhomemaking.com/2012/10/welcome-to-think-tank-thursday-3.html
Nicely done!!!! Love how you added the baskets. I'd say you nailed it. Awesome makeover!
🙂
Kelly
I absolutely love this! You really did do such amazing job!
appleofmamaseye.blogspot.com
I am so in love with this piece ANd so jealous!
That is fabulous! You are talented!
Love this upcycle.. came to you through Knock Off Decor. I just have a few questions: #1, where did you get those awesome pulls? and #2, how much do you think you spent overall? I know the furniture itself was free but the molding, paint, pulls, baskets, etc.? Thanks for the info– I am subscribing because I, too, am a dumpster diver! Just picked some gorgeous adirondack chairs, four delapidated planters and a croquet set off of someone's curb. People throw away GOLD! =)
@MJ Poppyseed, there is no link to respond back to you so I am replying in the comments. I spent about $10 on molding, $20 on paint, $11 kilz primer, $20 on the knobs and $12 on baskets (both found at Hobby Lobby for 50% off) All other items, tools, sanders, sanding papers I had on hand: so it totaled to roughly $75. It is a heavy solid wood large dresser so I think $75 was a steal. You are right, people throw away some pretty cool items. I hope that helps!
Tami @ Curb Alert!
Impressive transformation! What are you plans for the companion nightstand/end table?
Ooops, typo: What are youR plans for the other freebie that accompanied this piece?
Okay, first I have to say how starstruck I am that YOU came to my little blog and left me a comment!! Second, to borrow your husband's phrase with a little of mine added – HOLY C#&P!!!!! Your dresser is way better than the Pottery Barn dresser – seriously! You did a fantastic job! I still haven't figured out exactly what I'm going to do to mine but it will be similar to yours, with the open cubby for a couple of baskets. It's the colors that I'm struggling more with. My room is so dark that I'm afraid the black would darken it even more. At the moment, it's in place with the new TV on top and I'm just "sittin' and studyin' it"! It'll come to me. Especially with help from a rockstar like you!
Jaye
I loved this the first time I saw it and now after it made one of the Favorites of 2012! Great job!! Visiting from Second Chances in PA http://secondchancesinpa.blogspot.com/
Love your dresser makeover! By taking off the doors and adding baskets gave it a brand new updated look. Love the black too.
~Marie@The Interior Frugalista
Awesome job! Amazing transformation.