One dark and dreary rainy evening on my way home from grocery shopping I stumbled upon a broken outdoor garden bench. Where did I find it, you ask? Well of course, the curb!
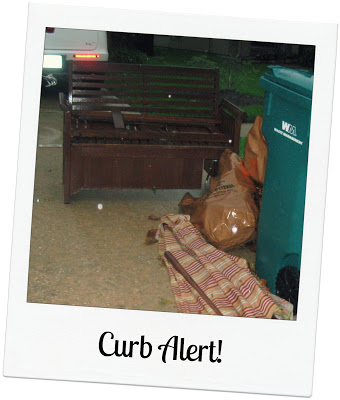
It was shabby and faded and broken but as you know that doesn’t stop me. I tried to shove it in the car and it was quite a squeeze. I had to really budge it in there at every angle to make it fit! The rain started to pour down and I looked like a little wet puppy on the street. I rushed home and put my groceries away and actually forgot about it in there for a few hours.
Finally dragged it out and assessed the damage. It was pretty worn and missing a bunch of wood pieces. It was also leaning and uneven where the corners had gotten messed up.
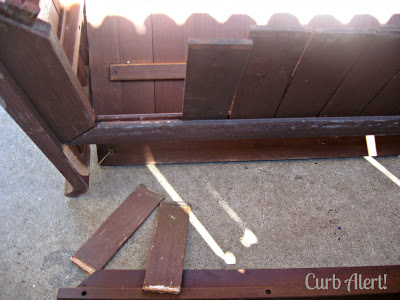
Looks like someone had tried to glue it before so I had to scrape dried glue out of all of the crevices and then fit the slats together like a puzzle. This sounds easy but I actually gave up for awhile and asked My Love to help. It definitely was a two person job and that seemed to be the trick. We manage to finally get it together.
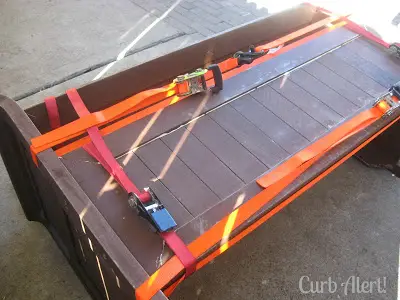
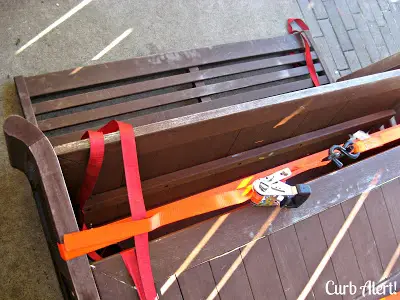
We then glued it up in the joints and bolted it all together with toggle straps and squeezed it really tight and left it to dry overnight.
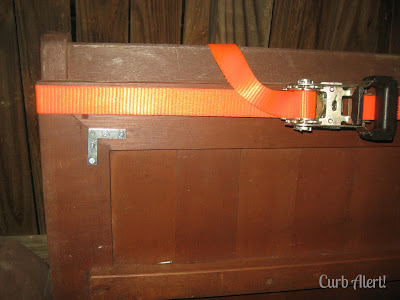
The next day My Love brought me a “something for nothing” gift which turned out to be a pretty great idea. He found some little L-Brackets to screw into the joints so that they will not shift.

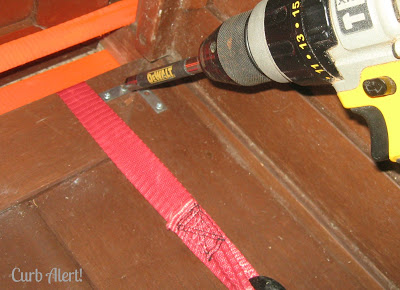
It took me all of about 10 minutes to screw them all in but turned out to be the hardest part due to some unforeseen circumstances.
Note to self * make sure your drill battery is charged up, do not try to work on a project with a three year old running around tripping over you, a large dog sniffing in your ear and mosquitoes biting every part of your body * just sayin’!
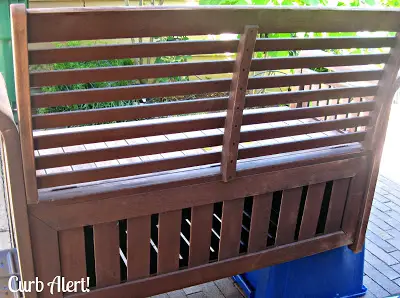
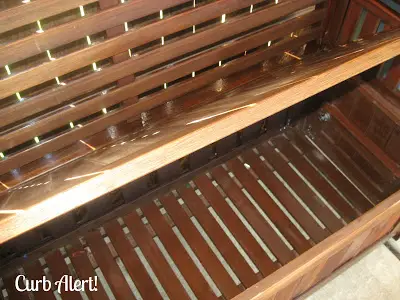
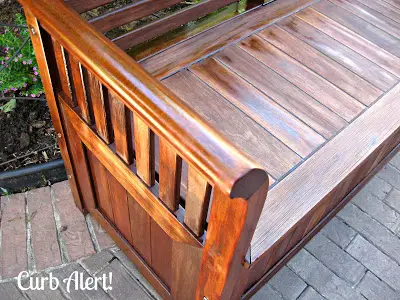
Here is a picture of the backside. Some of the slats were missing (kind of a given in the curb-shopping game) but I improvised and spaced them apart. Looks fine!
Well heck, looks very fine…I even impress myself at times with my skills!
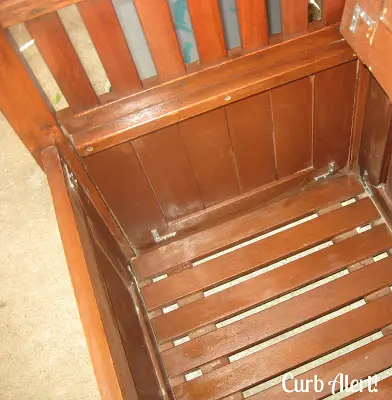
Here is a peek inside at the storage area under the bench seat. Not too bad of shape.
I sanded and sanded for days on end. It probably would have taken a few hours but I had a few other priorities like feeding my 4 kiddos. The nerve of them wanting to eat, right?
I then washed it down really good with a wet rag to get all of the grit off.
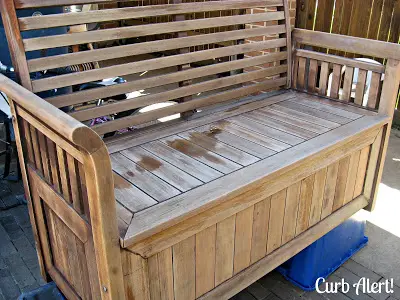
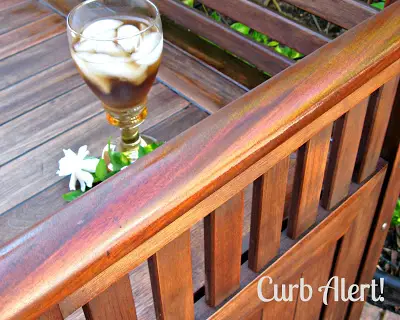
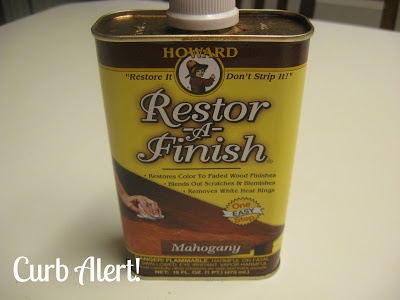
The next step was the fun part. I used some wood refinisher that I had on hand. It’s a very lightly tinted mahogany color and so easy to put on! I have also used this on my kitchen floors, it really works!
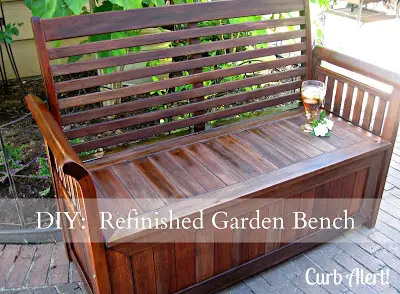
And here it is all spruced up for spring, sweet tea and all!
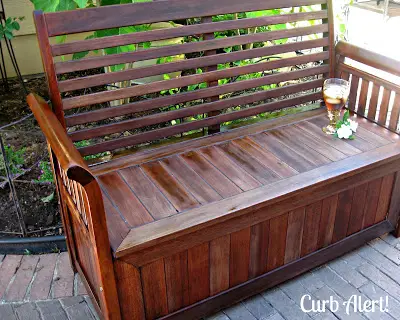
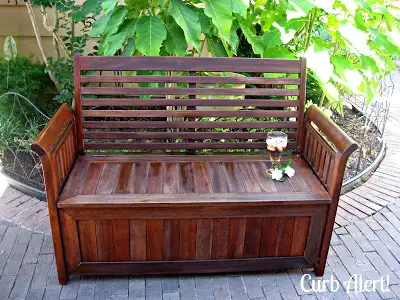
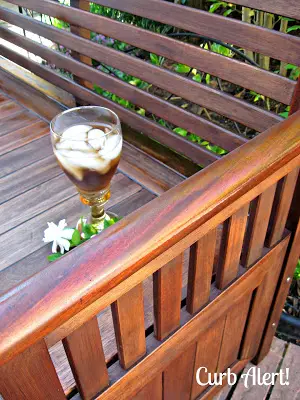
You know I have to get every angle! … and include my favorite Gardenia flowers in there.
Okay, now I am getting thirsty!

So tell me what you think. Should I keep it?
I think YES!
You never know what you’ll find, even in the rain. Don’t ever hesitate to stop, it only takes a second you may get filthy dirty stinkin’ wet but still! It made my grocery shopping evening much more fun.
Happy Treasure Hunting!
~ Tami
Taking my sweet tea over to these Link Parties!


Yes that is a total Keeper! You did a great great job on this bench! Wow- and pour me a glass… I will be right over to enjoy it with you! Cheers Tami!
Jen
OMG! You are a miracle worker!!!!
You GO Girl!! Def a keeper!! TFS
Chelle kweenbee_612@yahoo.com
You are the patron saint of abandoned furniture! I think that bench wants to stay with you forever. ~ Maureen
Tami, you are so talented!!! Yes, it is a keeper! It looks beautiful! Nobody would ever believe what it looked like before. You have done an amazing job restoring it! This is a bench you will enjoy for many years to come!
WOW! That has got to be the best thing yet. Great job.
Okay…I'm going to go make some SUN TEA NOW!!!! Great job on that bench!!!
That is an unbelievable makeover! Wow!! You can fix anything…amazing. Glad you linked up! Kristen
Holy cow! What a makeover!! It looks amazing!! Youre awesome 🙂
Your curb find makeovers always amaze & impress me! This bench looks fantastic!
Smiles,
Carol
First, I seriously need to know the tips and tricks to curb shopping. Second, you're talent is amazing. I'm so glad the bench got a new life and it looks beautiful!
Thank you for sharing it at Show & Tell!
Sharon @ mrs. hines class
Lovely! You did a fantastic job!
Wow look at you go, good job girly! Looks like what I've seen in the shops for like $300+ love a good kerb side find 🙂
SCORE!!! you knocked this one out of the park. Well done! It's a keeper for certain. You always impress me with your wonderful finds and transformations. Hugs and happy weekend wishes!
Thanks so much for linking up this great find @CountryMommaCooks….have a wonderful Sunday:)
Wonderful blogpost. I'm your new follower. More power to you!
Those teak benches sure look brand new once you re-coat them! Nicely done.
Buy and sell new and used modern, outdoor, office, bedroom and home furniture.
Choose from a great selection of gently used furniture for every room in your home.
More here postallads4free.com
Love how it turned out!
Looks great!
With the help of refinishing we can easily give old patio furniture a new life. That's great for a long-lasting finish.
Wicker Outdoor furniture